How I set up a new (headless) Raspberry Pi
My preferred quick way to get a new headless Raspberry Pi install up and running
In the summer of 2021 the company I work for, Polteq challenged us. They gave us a Raspberry Pi 3 (with a custom case, power cord and SD card) and told us to explore a new solution using the Raspberry Pi at our home, exploit this using knowledge of our own, our colleagues or the internet, and deliver and manage this solution, both the technology itself and sharing what we’ve done. This is the first of several blogpost detailing my submission for this challenge. I’ll be setting up my Raspberry Pi for my solution to a problem in our home (what exactly this is will be secret for a bit :D).
This is my… sixth? Raspberry Pi, I think, and by now I have a set way in which I always deploy a new OS on the Raspberry Pi to get started. I always run my systems headless (no monitor, keyboard or mouse connected), and this means a few extra steps during set up. Instructions for your computer (not the Raspberry Pi) below are all for MacOS. They should be similar on Linux, for Windows, please check the source documentation.
Set up the OS
First I determine if I need a full OS (with visual desktop) or if a Lite version (just terminal access) will do. Also, might there be a dedicated OS that fits better with what I want to do? Examples of specific usage OS’s are:
- motionEye for camera use
- Home Assistant OS for IoT
- RetroPie for (retro) gaming
In this case I want a full standard OS. There are several flavors of Linux you can run, but I’m going to stick with the Raspberry OS itself, it is developed by the Raspberry Pi Foundation itself and probably works best.
Loading the OS on the SD card is easy with the Raspberry Pi Imager, which is available for MacOS, Windows and Linux. This application will format your SD card, download the OS and load it on your SD card. After that you can plug it in the Raspberry Pi and start playing.
Plug your SD card into your computer (not the Raspberry Pi). Open the Raspberry Pi Imager, select your OS, your card and click Write. You might need to enter your password to continue (because the Imager will reformat your SD card).
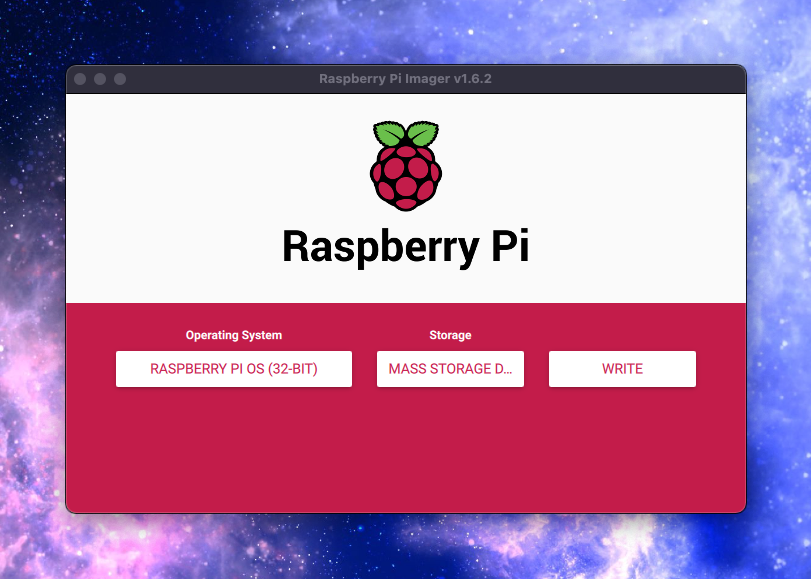
1. Screenshot of Raspberry Pi Imager, ready to set up Raspberry OS on my SD card
Wait for the image to be loaded, and verified (this might take a while, don’t worry). After it is done safely remove the SD card from your computer. Don’t put it in your Raspberry Pi just yet, let’s set up a wifi connection and SSH so we can immediately connect to the Raspberry Pi without first using a screen/keyboard/mouse connected.
Set up Wifi
To set up wifi before even starting up your Raspberry Pi you can use a file in the root directory. This is the wpa_supplicant.conf file.
First navigate to the SD card and create the file:
cd /Volumes/boot
touch wpa_supplicant.conf
Then edit this file with a test editor. I always use nano, which works out of the box for MacOS and Linux.
nano wpa_supplicant.conf
Put the following lines in this file, update with your own wifi SSID (wifi network name)
country=NL
ctrl_interface=DIR=/var/run/wpa_supplicant GROUP=netdev
update_config=1

network={
    scan_ssid=1
    ssid="<Name of your wireless LAN>"
    psk="<Password for your wireless LAN>"
}
You can close nano using CTRL+Q, Y and Enter.
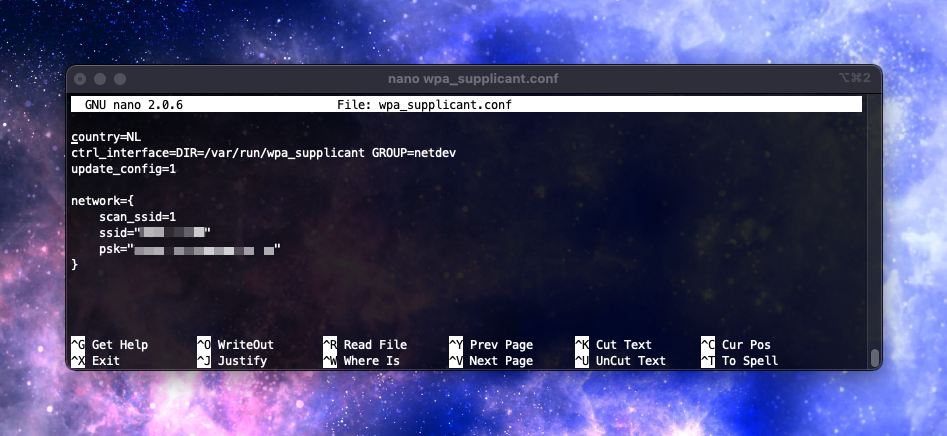
2. Screenshot of my wpa_supplicant.conf file opened in nano
For more explanation on how does works, and for how to do it on other systems or help if it does not work, check the official Raspberry Pi Foundation documentation page.
Set up SSH
SSH is a secure way to connect to the Raspberry Pi command line interface from another computer within your network. This makes it very easy and quick to manage the Raspberry Pi, especially because the GUI is not as quick as we are used to from our normal machines. SSH setup on the Raspberry Pi is incredibly easy, just create a file called ssh in the root directory.
cd /Volumes/boot
touch ssh
Start up the Raspberry Pi for the first time
Make sure the power cord is not connected to the Raspberry Pi. Put your SD card in the Raspberry Pi and plug in the power cord. The Raspberry Pi will now start up. You’ll see the red PWR led on the board light up, and the green ACT led will start blinking.
Use the admin interface of your modem/router or an app like Fing to find out the IP address of the Raspberry Pi. It will identify itself on your network as raspberrypi. Take note of the IP address. We will use this to SSH into the Raspberry Pi and do some more set up.
First SSH connection and change the host name
Let’s connect to our Raspberry Pi using SSH. In your terminal type:
ssh pi@<ip address>
This command uses SSH to connect to the pi user on the IP of your Raspberry Pi. You will get a warning because your system has never connected to this IP before. Type yes to continue. If the connection works, it will now ask for the password of the pi user. The default password is raspberry (don’t worry, we’ll change this soon).
Now, I never remember IP addresses, I like to give all machines on my network a name. I have a naming scheme using names from Doctor Who, and in this case I’m going to name my Raspberry Pi face-of-boe (it kind of matches what I want to do with this Raspberry Pi).
In the terminal window that is connected via SSH to the Raspberry Pi, type:
sudo nano /etc/hostname
Even though we are on our own computer, we are actually executing this command on the Raspberry Pi. This opens the hostname file in nano. You’ll see just one name, raspberrypi. Remember, that was the name you saw when you determined the IP of the Raspberry Pi. Change it to what you want your new name to be.
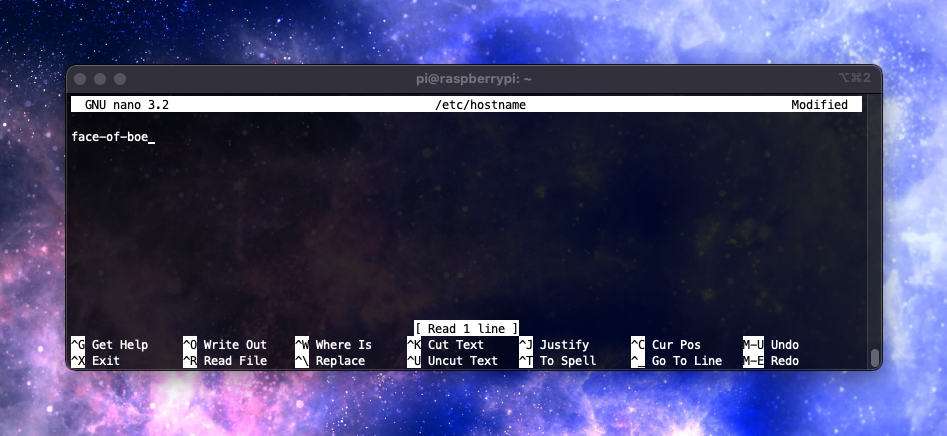
2. Screenshot of my hostname file opened in nano
Close nano using CTRL+Q, Y and Enter.
Also edit the hosts file:
sudo nano /etc/hosts
Where it says raspberrypi, also change that to the new hostname and save the file.
Reboot your Raspberry Pi using:
sudo reboot
Wait a bit, then reconnect. You can now use ssh pi@<hostname>. You will get a new security warning (because your computer does not recognize this new hostname). Type yes, your password and you should be connected again.
If you cannot reconnect, make sure the Raspberry Pi is running and you did not shut it down completely. Connect using the IP address, that should still work. When you are connected, type hostname and check that your hostname was set correctly.
Source for this part of the tutorial, with a bit more explanation can be found at The Pi Hut.
SSH access without password using your public key
NB: This is very UNIX centric, I don’t know how to do this on a Windows machine. A quick search online should find it.
I hate typing in passwords, and luckily, we can still safely connect to our Raspberry Pi over SSH, without using a password. We will use our SSH key for that. On your main computer (not the Raspberry Pi), check first if you already have a key.
ls ~/.ssh
If you see any file ending in .pub, you already have a SSH keys. If you don’t, you can generate your keys using:
ssh-keygen
You can leave it on the default name. It will ask you if you want to set a passphrase, which will be asked anytime you want to use the key. I really don’t like this (the whole idea was to not have to use passwords), so I leave it blank.
If you check the directory again, you should now have a .pub file, and a file with the same name, but without the .pub extension. That last one is your private key. Don’t share that with anyone!
Now we can copy over your key to the Raspberry Pi. On your main computer, type:
ssh-copy-id pi@<hostname>
This will add your public key to the authorized keys file on the Raspberry Pi. It will ask you one last time for your password (to the Raspberry Pi). When you connect this will be used to authorize the connection. You can test this out by establishing a new SSH connection, this should not prompt for a password anymore.
Change the default password
We won’t have to use the password anymore, but we should still change it from the default value of raspberry. Let’s do that now.
Type passwd in your terminal (connected to the Raspberry Pi). You will be prompted for your old password (raspberry), and your new password twice.
Update the Raspberry Pi
Even though we just installed the OS, it doesn’t hurt to check for updates. In Linux we use two commands for this:
sudo apt update
sudo apt upgrade -y
The first one will update all package lists, the second command will upgrade all packages that have an upgrade available (with the -y flag to answer all question prompts with yes).
Enable VNC
SSH connections are nice, and they offer you a lot of power, but sometimes, you just want something visible. To connect to the desktop of the Raspberry Pi, we can use VNC. This is included by default on the standard Raspberry Pi OS, we just have to install and configure it.
On the Raspberry Pi do (normally we also have to run sudo apt update first, but we just did that):
sudo apt install realvnc-vnc-server realvnc-vnc-viewer
We can enable the VNC server using raspi-config. This is a config program you can start from the command line.
sudo raspi-config
Navigate to Interface Options using your arrow keys and enter. Select option 3 for VNC, and select Yes.
You can now use your preferred remote desktop program (I use Screens) to connect to the desktop of the Raspberry Pi.
Commands you need to know
There are several command line commands that are very useful to know.
The Raspberry Pi does not have an on/off button, and just pulling the power cord is very risky for your SD card. You can safely reboot using:
sudo reboot
And shutdown using:
sudo shutdown
After shutdown you need to remove and replug the power cord to restart the Raspberry Pi.
What’s next?
Next I will start the setup of my solution for the challenge itself. I have quite a few pages of notes ready of ideas and wishes. I’ll make a write up of that too. And for you? Whatever you want. Check the quality free publications put out by the Raspberry Pi Foundation (all freely availble online), they have tons of project ideas!